User roles and teacher view
| Site: | MDX Sandbox 1 |
| Course: | Tarek Zoubir Course |
| Book: | User roles and teacher view |
| Printed by: | Guest user |
| Date: | Sunday, 31 August 2025, 9:06 AM |
1. Role types
A role is a collection of permissions defined for the whole system that you can assign to specific users in specific contexts. The combination of roles and context define a specific user's ability to do something on any page. The most common examples are the roles of student and teacher in the context of a course.
A number of roles exist in Moodle. These roles can be customised at site administration level and you will likely only encounter teacher and student type roles (in bold) because this is all you will need.
- Site administrator - can "do everything" on the site
- Manager - a lesser administrator role
- Course creator - can create courses
- Teacher - can manage and add content to courses
- Non-editing teacher can grade in courses but not edit them
- Student - can access and participate in courses
- Guest - can view courses but not participate
In this introduction to roles we will share with you some basics of teacher view.
2. Teacher role and editing
Teachers can do anything within a course, including changing the activities and grading students.
- Editing is not turned on by default. Course tutors should turn editing on by clicking the in the upper right corner of their screen (alternatively this can be done within the administration block).
- If this option displays as "Turn editing off" then editing is already turned on. The editing option is not available to non-editing tutors or students.
Below are images of the course summary with editing turned off (image 1) and on (image 2):
- Image 1 (how a course section looks when editing is turned off):
![]()
- Image 2 (how a course section looks when editing is turned on, notice the editing icons now visible):
![]()
Notice the number of new icons and options that will be displayed across the course allowing editing. As a teacher you can edit section titles and summaries, add activites and or resources as well as have control over the course settings.
3. Administration block
When the options are collapsed the administration block looks like this:
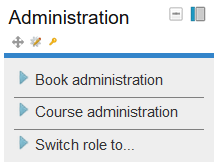
The administration block provides options to
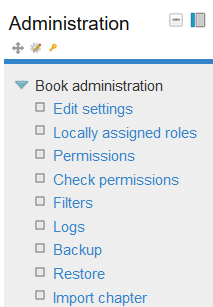
- edit the activity/resource being viewed (the image below shows the link to edit the 'book' resource)
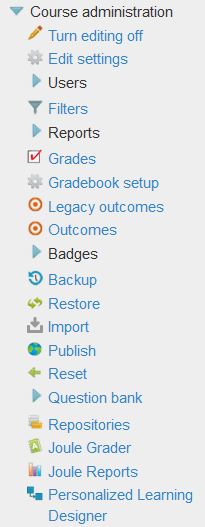
- edit the course settings, which also includes viewing and enrolling users (teachers can only enrol colleagues and not students)
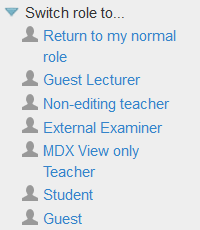
- switch user role (this can be useful for providing a 'student' view)
4. Course admin: edit settings
Below is a brief explanation of some of the options avaiable when editting the settings of a course. These options are available via the course administration block and upon clicking 'edit settings' (as in the image below)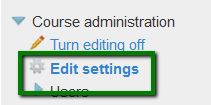
Course format
Within these settings the 'Course format' option determines how the course content will be presented. We recommend only the use of
- weekly (like folder view except that it automatically generates dates for each course section which may have to be edited to account for content:academic year)
- folder (divides course sections into collapsible folders) or
- topic view (displays all the course sections on the page)
Appearance
If the number of 'items to show' is changed for an existing course so that the number is less than the number of course sections containing activities (for example the course contains activities in 3 sections and the number or weeks/topics is set to 2) then when editing is turned on section(s) at the bottom of the course page will be shown with the title 'Orphaned activities' and these will not be available to students. This can be undone by increasing the number of items to be shown.
Files and uploads
This setting defines the largest size of file that can be uploaded by students in this course. The site administrator will determine sizes available for the teacher to select.
When uploading large files, consider that your students will need to download them to view them.
Completion tracking
If you wish to track students or to allow students to track their progress then this should be enabled. Teachers can then switch this on or off and add completion criteria within each resource/activity setting.
Groups
You may leave groups set to "No groups" and still have specific activities use groups. In this case the force setting below should be set to "no". For example, the teacher can use a group setting to completely separate cohorts of students such that each group is unaware of the other in the course

- Group mode
Here you can define the group mode at the course level by a pull down menu. "No groups", "Separate groups" and "Visible groups" are the choices. The selected setting will be the default group mode for all activities defined within that course. The group setting can affect what users see in the Participants list and who they can interact with in activities.
- Force
If the group mode is "forced" at a course-level, then this particular group mode will be applied to every activity in that course. The force setting is useful when the teacher wants to set up a course and not have to change each activities group settings. - Default grouping
If groupings (a collection of groups) are enabled, a default grouping for course activities and resources may be set.
.