Adding common resources
| Site: | MDX Sandbox 1 |
| Course: | Tarek Zoubir Course |
| Book: | Adding common resources |
| Printed by: | Guest user |
| Date: | Friday, 12 December 2025, 3:03 PM |
1. Adding a file
The file resource enables a teacher to provide a file as a course resource. Where possible, the file will be displayed within the course interface; otherwise students will be prompted to download it. The file may include supporting files, for example an HTML page may have embedded images or Flash objects.
Note that students need to have the appropriate software on their computers in order to open the file.
A file may be used
- To share presentations given in class
- To include a mini website as a course resource
- To provide draft files of certain software programs (eg Photoshop .psd) so students can edit and submit them for assessment
Adding a file
To add a file to your course:
Quick 'drag and drop' method (may not work on some browsers depending on configuration)
- Click the 'Turn editing on' button at the top right of the course page
- Drag and drop the file onto the course section where you'd like it to appear
- Once uploaded the file can moved on the page using the cross icon, the title of the file can be editing by clicking the pencil icon or edit other options by clicking the editing icon

Longer method:
- Click the 'Turn editing on' button at the top right of the course page
- Click 'Add an activity or resource' link
- Select 'File' then click the Add button
- Enter a link name and a description (description is optional)
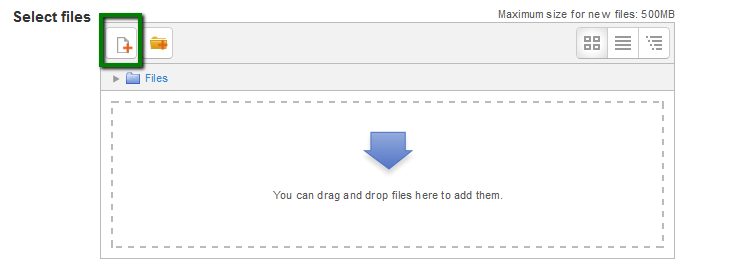
- Either drag and drop a file into the box or click the file icon with a red plus symbol to open the File picker menu in order to choose a file from your computer or a repository
- Select appearance options as required
- Click the button 'Save and display' or 'Save and return to course'
2. Adding a folder
The folder resource enables a teacher to display a number of related files inside a single folder, reducing scrolling on the course page. A zipped folder may be uploaded and unzipped for display, or an empty folder created and files uploaded into it. The resources may be of different types and they may be uploaded in one go, as a zipped folder which is then unzipped, or they may be added one at a time to an empty folder on the course page. When the folder icon is clicked, the resources it contains are displayed for the student.
A folder may be used:
- For a series of files on one topic, for example a set of past examination papers in pdf format or a collection of image files for use in student projects
- To provide a shared uploading space for teachers on the course page (keeping the folder hidden so that only teachers can see it)
Adding a folder to your course
Note: Folders you wish to upload to Moodle have to be "zipped" or "compressed" first. The way you do this depends on your computer and operating system.
If you already have a folder of files you would like to display, there are two methods:
Quick 'drag and drop' method
- Click the 'Turn editing on' button at the top right of the course page
- Drag and drop the folder onto the course section where you'd like it to appear
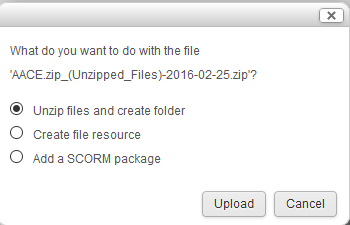
- Click the button of the action you would like to take with the folder (in our case, "Unzip") and click "Upload." Alternatively, the 'create file resource' option would keep the folder zipped and users will not be able to access individual files within the folder unless they download the entire folder.
Longer method
- Click the 'Turn editing on' button at the top right of the course page
- Click 'Add an activity or resource' link, then in the activity chooser select folder then click the "Add" button
- Enter a name and a description (description is optional)
- Either
- drag and drop a zipped/compressed folder into the box with an arrow or click the Add button to open the File picker menu in order to choose a file from your computer or a repository.
- or upload individual files
- Select your chosen Common module settings and other settings
- Click the button 'Save and return to course' at the bottom of the page
3. Adding a URL
The URL resource enables a teacher to provide a web link as a course resource. Anything that is freely available online, such as documents or images, can be linked to; the URL doesn’t have to be the home page of a website. The URL of a particular web page may be copied and pasted or a teacher can use the file picker and choose a link from a repository such as Flickr, YouTube or Wikimedia (depending upon which repositories are enabled for the site).
Note that URLs can also be added to any other resource or activity type through the text editor.
Adding a URL resource to your course
- Turn editing on
- Click 'Add an activity or resource' and select URL in the activity chooser
- The "Adding a new URL" screen will ask for a link name and a description (a description is optional)
- Either enter the URL in the external URL field or click the "Choose a link" button to open the file picker and choose a URL YouTube, Picasa etc (depending on which repositories are enabled for the site)

Appearance
We recommend opening external links in a 'new window.' This is the default option.
4. Adding a page
The 'page' enables a teacher to create a web page resource using the text editor. A page can display text, images, sound, video, web links and embedded code, such as Google maps.
Advantages of using the 'page' rather than the 'file' resource is that you can add rich media content such as videos. For large amounts of content, it's recommended that a book is used rather than a page.
A page may be used
To present textual information such as a summary of the course syllabus
To embed videos, images or sound files together with some explanatory text
Adding a new page to your course
- Click the "Add an activity or resource" link
- Choose Page
- In the "Adding a new page" screen that follows, give your page a name and a description (a description is optional)
- Add your content to the Page content section
Appearance
By default the page will open within the existing window. Alternatively the page can be set to open in a pop-up window.
There is also an option to display the page description on the course page below the link to the page.
Restrict access
Like other resources and activities access can be restricted/made conditional using the settings for that particular activity.
5. Adding a book
The book resource enables a teacher to create a series of content pages with chapters and subchapters. Books can contain media files as well as text and are useful for displaying lengthy passages of information which can be broken down into sections.
A book may be used
- To display reading material for individual modules of study
- As a staff departmental handbook
- As a showcase portfolio of student work
Adding a book
- A teacher can add a book by choosing it from the "Add an activity or resource" link
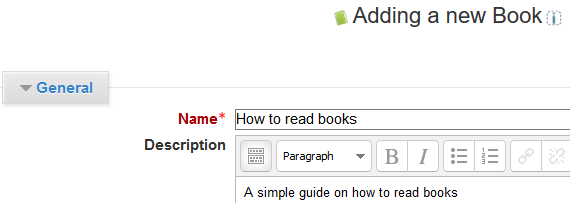
Give your book a name and a summary
Tell your students what your book is called and provide a brief description of its content. Keep in mind that the name you give your book will become the text for the link to it on your main course page. This is true of all the activities you create in Moodle.
Appearance - Indicate how you want chapters numbered
There are several predefined numbering types:
- None - chapter and subchapter titles are not formatted at all, use if you want to define special numbering styles. For example letters: in chapter title type "A First Chapter", "A.1 Some Subchapter",...
- Numbers - chapters and subchapters are numbered (1, 1.1, 1.2, 2, ...)
- Bullets - subchapters are indented and displayed with bullets.
- Indented - subchapters are indented.
Allow or disallow custom titles
Custom titles can be enabled to allow for longer titles that would not be appropriate in the table of contents. If you enable custom titles, you will need to enter the chapter title as part of the page content (the title field will only show up in the table of content). If custom titles are enabled and a heading not included as part of the page content then no title will show on the page.
Adding a chapter
Titles of chapters appear as links in the table of contents to the left of your content. Keep your titles short.
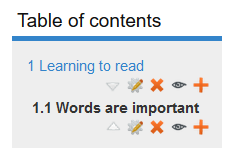
To add another chapter, click on the red cross in the Table of Contents or first chapter. The new chapter will be inserted directly after the chapter whose title is on the same line as the red cross you click.

Adding a sub chapter
Note that the sub chapter box is checked. A chapter may have many sub chapters, but sub chapters cannot have subchapters. In order to keep this resource simple, you are limited to two levels.
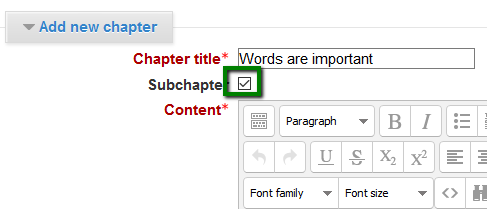
You now see a chapter and a sub chapter.
Printing books
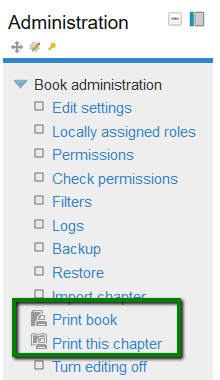
Whole books and individual chapters may be printed by selecting the relevant link in Settings>Book administration:
Background Colour
Font Face
Font Kerning
Font Size
Image Visibility
Letter Spacing
Line Height
Link Highlight
Text Colour