Understanding 'Blocks'
| Site: | MDX Sandbox 1 |
| Course: | Introduction to Moodle S&T |
| Book: | Understanding 'Blocks' |
| Printed by: | Guest user |
| Date: | Tuesday, 16 June 2026, 10:49 PM |
Description
This is an example of a book resource where you can group html pages together. These can have images and video embedded.
What are blocks and how are they docked?
Blocks are items which may be added to the left or right or centre column of any page in Moodle. They may also be added to the centre of the My Home (My Moodle) page. You can theme the position of blocks in the centre of pages as well.
Any block can be made 'sticky' so that it appears in all the contexts below, such as throughout a course or a particular activity - see Block settings.
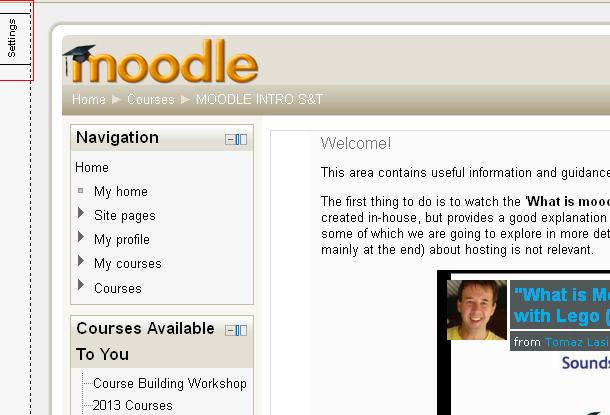
How to Dock/Undock a Block:
Blocks can be placed on the side of the screen (if your theme supports it) via the Dock icons (Block to Dock ![]() and
and ![]() Dock to Block)
Dock to Block)
- Locate the block to be docked and click on the "Block to Dock" icon:
- The block is now located in the margin:
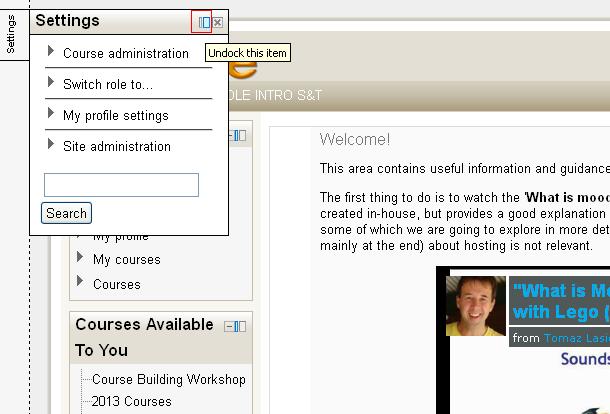
- Hover over the block to see the block contents:
To undock, click the "Undock this block" icon:
- To undock all blocks at once, click the "undock all" (bottom left) icon:
Types of Blocks

Blocks are items which may be added to the left or right or centre column of any page in Moodle.
They may also be added to the centre of the My Home (My Moodle) page. You can theme the position of blocks in the centre of pages as well.
Standard blocks include, but are not limited to:
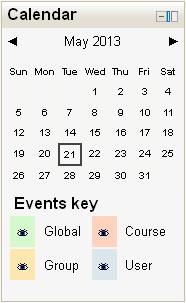
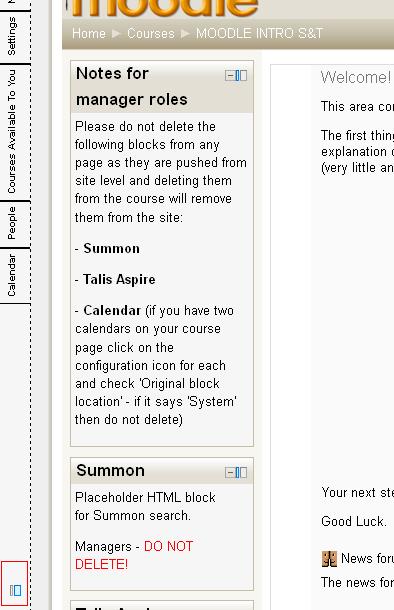
- Calendar
- Messages
- My private files
- Online Users
- for a more comprehensive list of standard blocks please visit: http://docs.moodle.org/23/en/Blocks
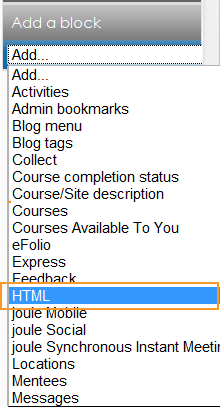
HTML Blocks
An HTML block provides a space for text, images, or multimedia in the left or right columns of the course.
The block is flexible and can incorporate a variety of functions and uses in the content area. It has the standard Moodle HTML editor for formatting text, adding images or creating links, switching to code view and allows any valid HTML markup to be used. This enables embedding video, sounds, Flash, and other files which can add unique elements to a course or site page.
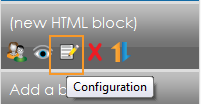
Add HTML Block to course.
Click the "Configuration" icon to add content to the block.
Add a title (optional) and content to reside in the block.
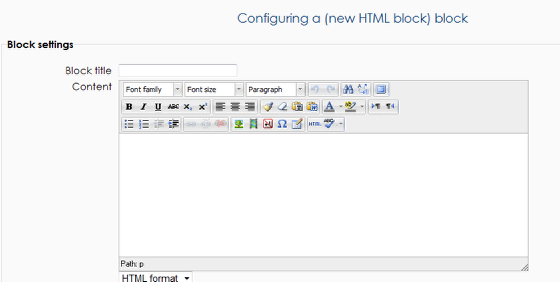
Text, images, and widgets can be placed in the HTML block area.
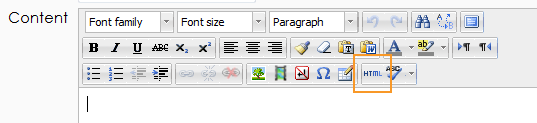
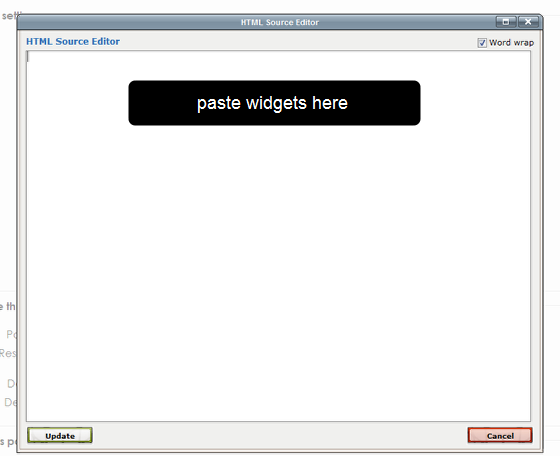
Advanced Tip #1: switch out of HTML editor mode in order to paste widget code.
Set up block settings.
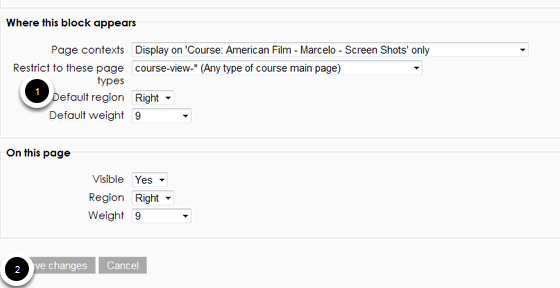
1. Select the viewing setting for this block (experiment with the weight to determine in which order blocks appear on the page).
2. Save changes
Drag and Drop Blocks
On the previous page in the last screenshot we saw the option to give a block a 'weight' which would determine the order in which it appeared on a page. However, the new drag and drop feature means that blocks can also be re-ordered by, yes, dragging and dropping! Watch the video below for a quick demo:
Background Colour
Font Face
Font Kerning
Font Size
Image Visibility
Letter Spacing
Line Height
Link Highlight
Text Colour